How To Make a Diffraction Spike Mask
I have seen these pleasing images where the stars have spikes coming out of them, most notably on the pleiades (seven sisters) images.
I want to be able to get these in my images as well, and now I have found out how to get them by using a diffraction mask on my LX200.
Today I decided to make some by using some plywood left over from my observatory build.
Here is a list of the raw materials I used:
- Plywood
- 8x Screws
- Spare length of wood (24″)
- 2ft Washing Line
- Black Wood Paint (optional)
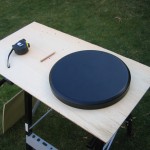
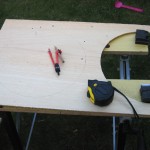 I began by taking the LX200 telescope metal cover and drawing a circle around that thinking that would be just right, although after then cutting it out with a jigsaw I found out that it was far too big.
So I went back and just measured the diameter of the telescope and then found an old style school compass to draw the circle on the wood.
I then cut out the circle using my electric jigsaw.
I then cut down the piece of plywood into one manageable piece, with about 1.5 inches to spare around the sides of the hole.
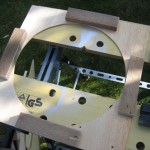 Next I cut four lengths of some rough timber I had spare which was used on a previous gardening job. You don’t have to add this part, but I did because I wanted the mask to sit back from the front of the telescope, plus these pieces of wood at every side allowed me to make the mask fit snugly around the scope.
I then screwed the pieces of wood with 2 screws on each of the 4 pieces of wood, although I only used 1 screw on 2 pieces of wood so that I could still move the pieces of wood once the mask was on the telescope to fit them even more snugly against the scope.
Now go back to the telescope and place the mask on the front and mark on the blocks of wood you have just attached to the mask where the screws are on the LX200. You should have a screw in each of the four corners of the cover that holds the main front glass in place on the front of the telescope.
Doing this will mean that your washing line crosshairs will be exactly in the centre on the mask.
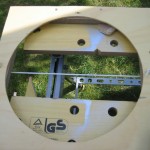 I then cut 2 feet of washing line from our main home washing line, although you could go out and buy this. I then cut the 2 foot piece into 2 x 1ft pieces. I tied a knot at one end of each pieces of the washing line.
Now drill holes with an electric drill all the way through the blocks of woods at the location you previously placed your telescope screw marks.
Thread the washing line through one of the holes. To hold the other end of the washing line in place I could have used wing nuts or bolts, but I did not have any, so I used a piece of dowelling, and hammered this into the holes to hold the washing line in place.
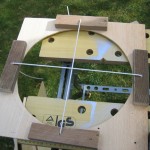
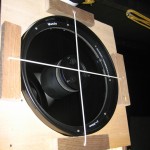 I then tried the mask on the LX200 to make sure the washing line crosshairs were exactly centered.
On my first attempt they were not so I had to re-drill some more holes and re-thread the washing line, then they were perfect.
Here is the unpainted mask on my 10″ LX200 telescope.
I then painted the mask by using some black wood paint from Wilkinsons.
Hopefully I will now get the chance to try the diffraction spike mask out and see what images I get.
